Updated on June 27, 2024
As of September 2021, the CPRVERIFY portal is permanently shutdown and users need to create an account on atlas.heart.org website to access their ecards.
Use same email ID you provided to the ITC during training to register.
Read the blog post below to understand how to use ATLAS.

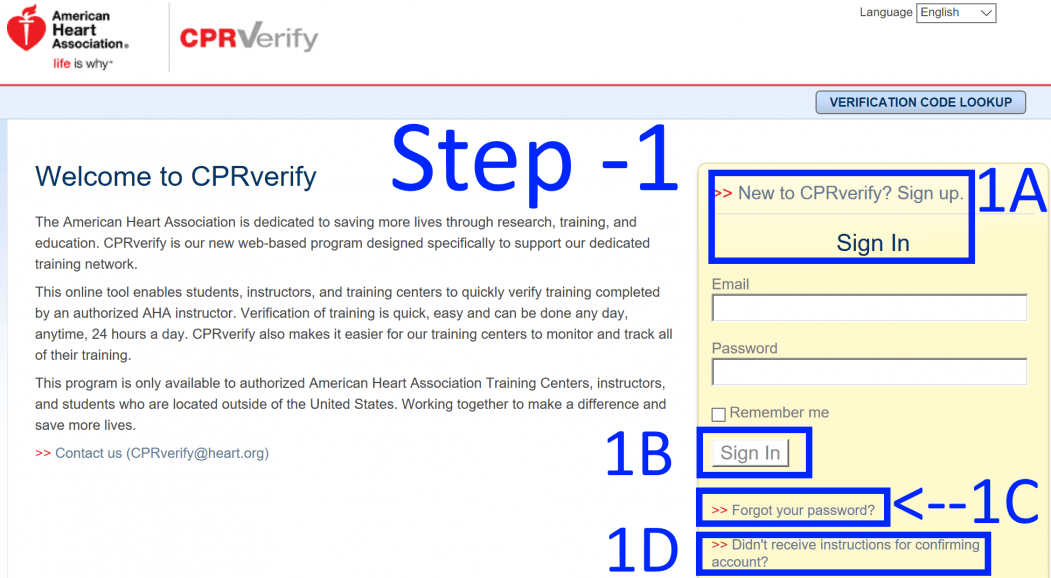
In this post, we’ll show you how to use CPR verify website. For any AHA course you are going to take (BLS ACLS PALS provider or instructor courses etc), you’ll need an account on CPRVERIFY.org On visiting the website, you’ll see a window as shown here.
How to use cpr verify website – Creating an account and adding a course code explained
1. Visit cprverify.org

1 Step 1 – After visiting the website, you’ll see an interface as shown in the image. Markings on image will guide you on the process (1A to 1D).
1A – If you don’t have an account, click Sign up.
1B – If you already have an account, sign in and you can skip to step 4 directly.
1C – If not sure, click forgot password, it’ll send a reset link if you have an account.
1D – After signing up, if you did not receive email confirmation after signing up. (Make sure you check your spam folder before requesting another verification email)
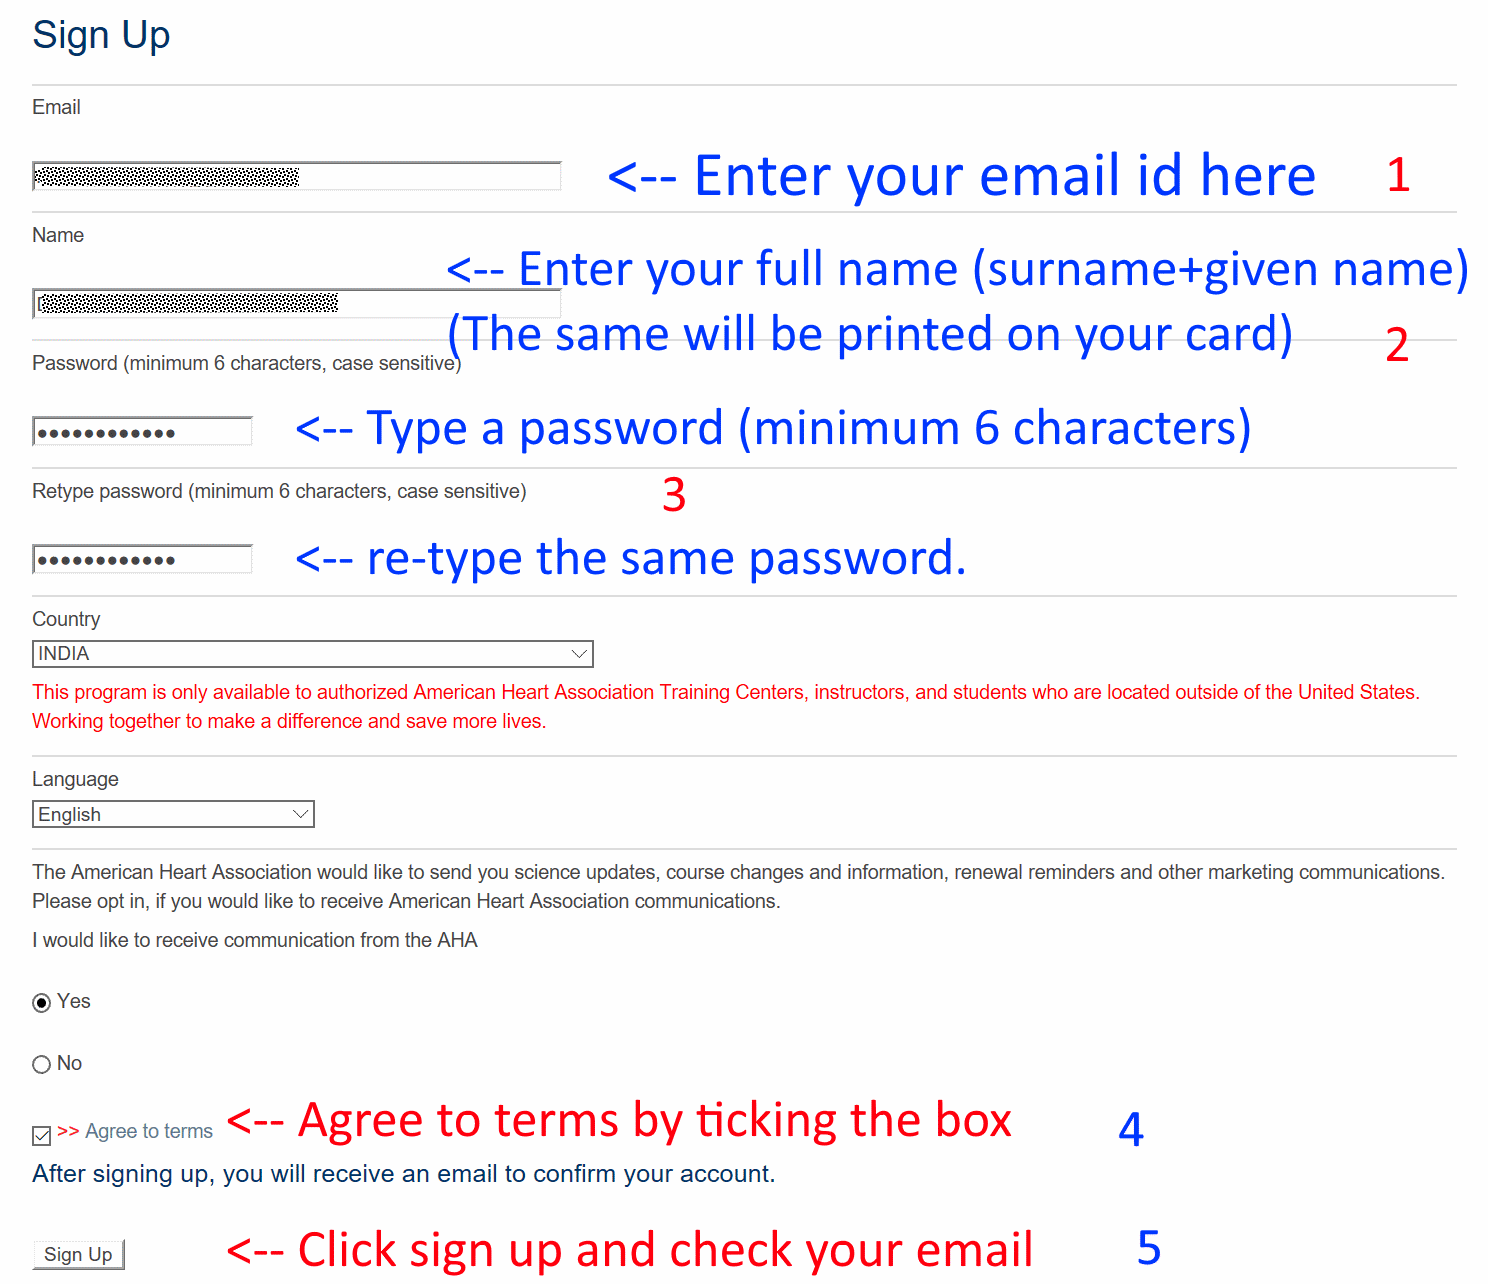
2. Sign-up

2 Step 2 – If you’ve clicked sign-up, make sure to enter full name in second column (This will be printed on certificates and it cannot be edited later (as of now). Enter first name first. You family name or Surname can be entered last. Enter full surname, do not use abbreviations. Remember the email ID you provided in the first column.
3. Confirm email

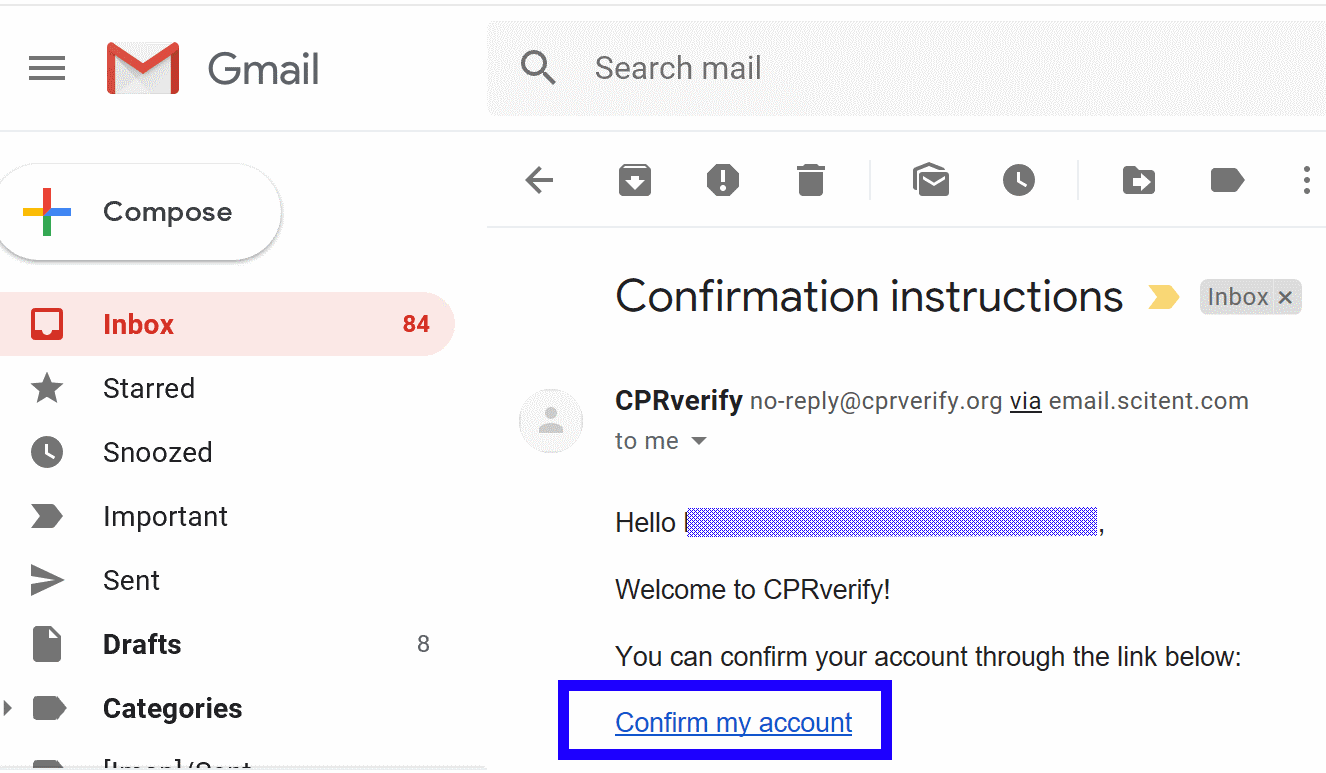
3 Step 3 – Access the same email ID you provided on the first column in the previous step and find an email similar to the one shown. It’ll have the email subject as “Confirmation instructions”. (Check spam/junk folder if it’s not seen in your inbox. iPhone/iPad users may have to move it out of junk into the inbox to click on the link – just tap on menu and click not spam, then go to inbox)
Once you see the email, click on “Confirm my account”.
If you can’t find an email from cprverify, you can request for another verification email to be sent by clicking on the link shown on first image on this page (Check step 1D).
4. After login

4 Step 4 – Once you click on confirmation link, you should see a window showing your name on top right, labeled as “1” in the picture and message at label “3” will also show your name. (The name has been masked in this picture).
Now click Add course at label “4” as in picture to enter the code received from your AHA training center (Add Course link is located at 2 places in the image. You can click any link).
5. Add course code

5 Step 5 – Enter the Course code you received in the green box and click add course. The code will be given on the course day (during the class) by your trainer. If you don’t have the course code now, you may exit this page and login again when you have the course to add it on this page. If you want to comeback later to enter the code, Bookmark this page “How to use cpr verify website” to revisit easily.
It’s a unique code for each candidate. Enter only 1 code per course and each code works only once.
6. Check added course

6 Step 6 – Click on “My courses”. You should see the course name and code you entered in that window. If it does not show the course name, contact your training center for help. Check the course code again and make sure you have entered exactly as given. Some times people copy paste the code with a space before or after code. Check if there are any spaces and differentiate zero from alphabet ‘O’. Similarly small l (for Larry) and capital i can look similar.
Your previous courses can be seen under my Courses and feedback tab.
Now that you’ve read how to use CPR verify website, If you want to locate you eCard after attending the course, check the following article.


