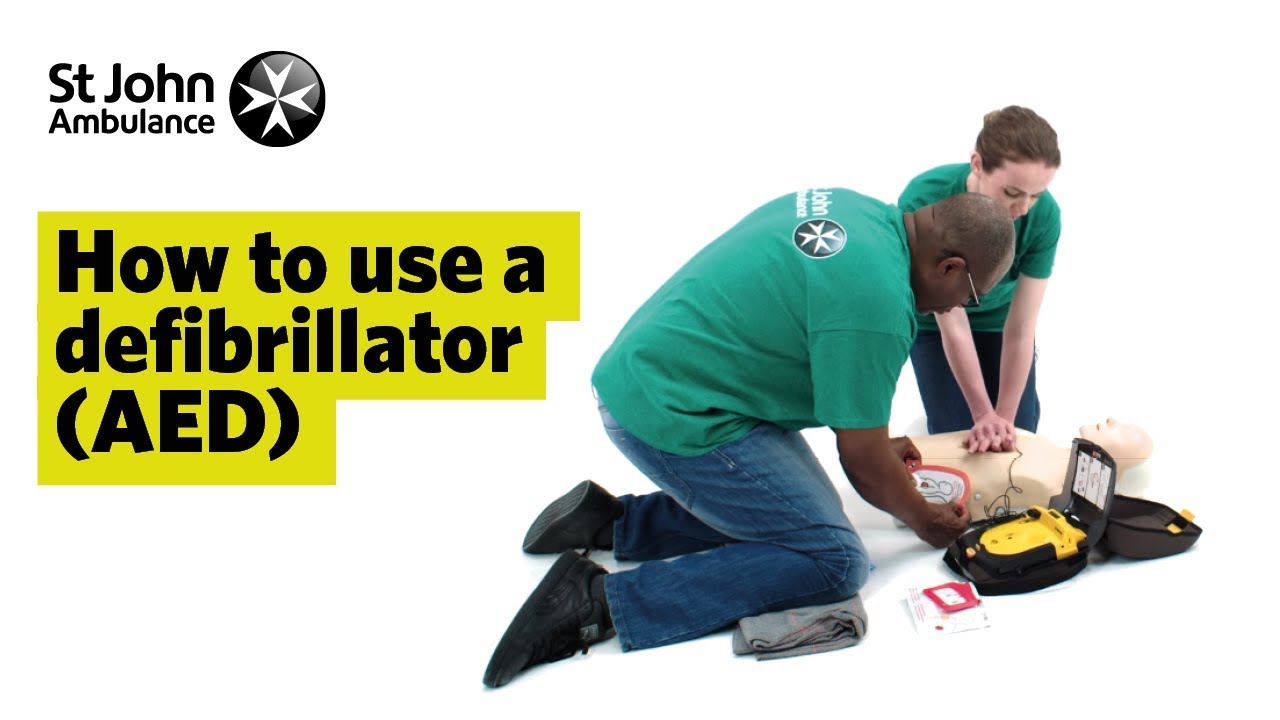
Automated external defibrillator – AED is a device that can analyse the heart rhythm of the victim automatically and can deliver a shock to stop that abnormal rhythm. The heart will try to restart the inherent normal sinus rhythm after an AED stops it’s rhythm. This can be used by anyone with minimal training. AEDs are generally made available in areas with high public gatherings such as Shopping malls, Bus stations, Railway stations, Airports, Trains, Flights etc

There are different models available, but the operation is more or less similar
STEP – 1 : TURN IT ON – Just like any other machine. (Some might turn on when you open the case). LISTEN to the prompts of AED and follow it. It’s designed for use by any non-medical person.
STEP – 2 : ATTACH the pads – Location of pad placement will be indicated on the pads. Peel of the pads and place them on victim. Remove any clothing over the chest. AED should not be used over clothing. If there’s too much hair, pads may not stick well. Shave the chest (if a razor is included) or use one set of pads to peel off hair forcefully and use second set for shocking (in case there’s a second set available).

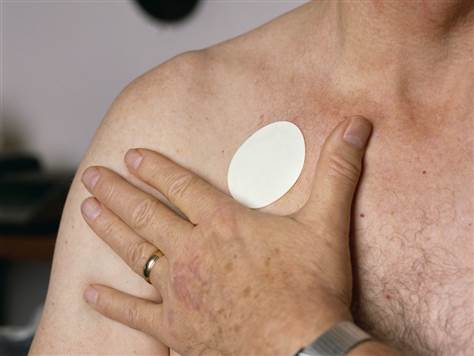
If there’s a medicine/drug patch on the victim which might prevent proper sticking of the pad, remove the patch, wipe and then attach the pads.
If the chest is wet, wipe it quickly.
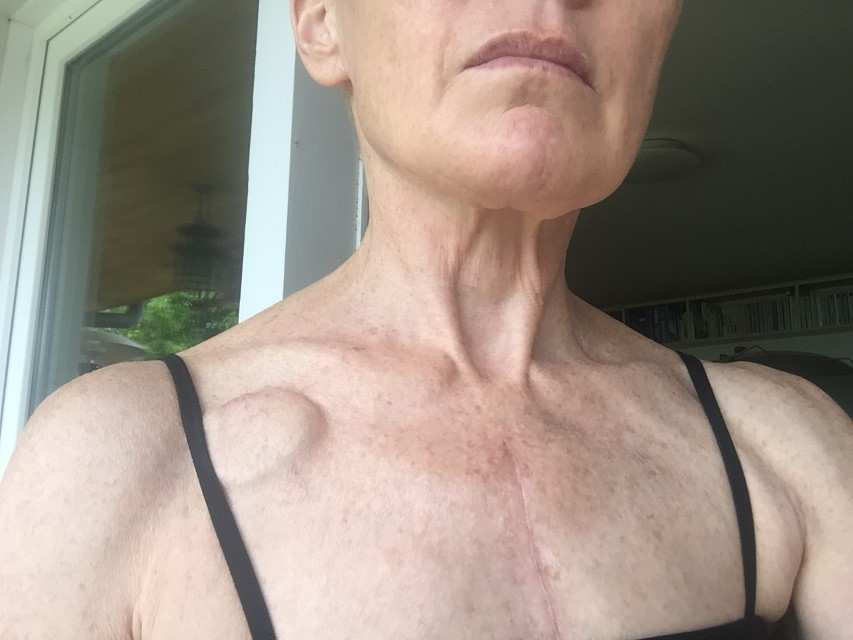
If the victim has an ICD – implantable cardioverter-defibrillator under the skin (looks like a lump as in the picture) on the right side, DO NOT place the pads over it. Affix adjacent to (beside) it.
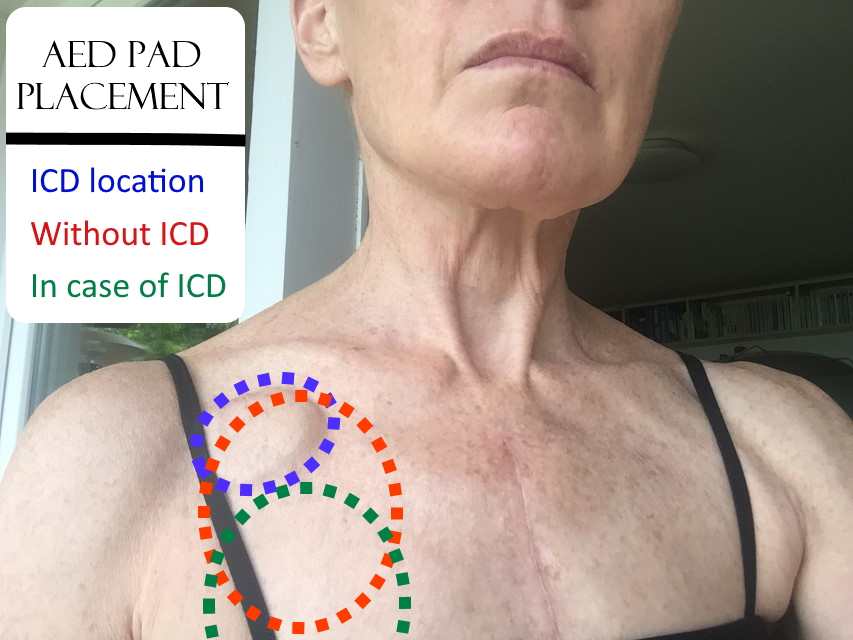
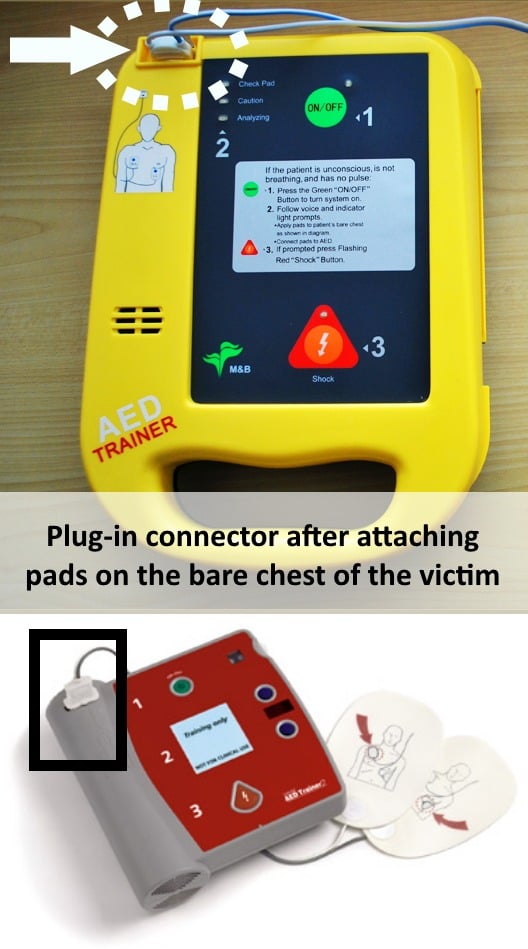
STEP – 3 : PLUG-IN the connector if it asks you to (Listen to the machine). Some machines have the pads always attached.
STEP – 4 : ANALYZE – Let it analyze the rhythm. The machine will ask you to stop chest compression for analyzing the rhythm. After analysis, it will tell you if a shock is needed. If a shock is needed, it’ll start charging. You may continue CPR when it is charging.
STEP – 5 : SAFE SHOCK – After it’s done charging, an indicator will light up and it’ll ask to deliver the shock by pressing a button. Before pressing the SHOCK button (Labelled as number 3 in the images), announce loudly (CLEAR) and check visually. Making sure no one is touching the victim, press the shock button.
STEP – 6 : RESUME CPR – After delivering a shock, do CPR for 2 more minutes. Do not check pulse immediately after shocking. Do not turn it off. At the end of 2 minutes, it’ll alert you to stop CPR for it to analyse the rhythm and the cycle continues.
